Creating a TImeline mission
What is “Timeline Mission”?
Unlike typical waypoint creation tools for drones, Airpeak Base’s Timeline Mission screen uses a timeline-based user interface similar to video editing software that customers in video production are familiar with.
You can create keyframes on the timeline and edit the aircraft’s movement between keyframes using Bézier curves. Airpeak Base automatically calculates the speed and acceleration of the aircraft based on the flight path and time between keyframes.
These features enable the creation of Timeline Missions that will result in smooth flight required for video production.
Timeline Mission editing screen
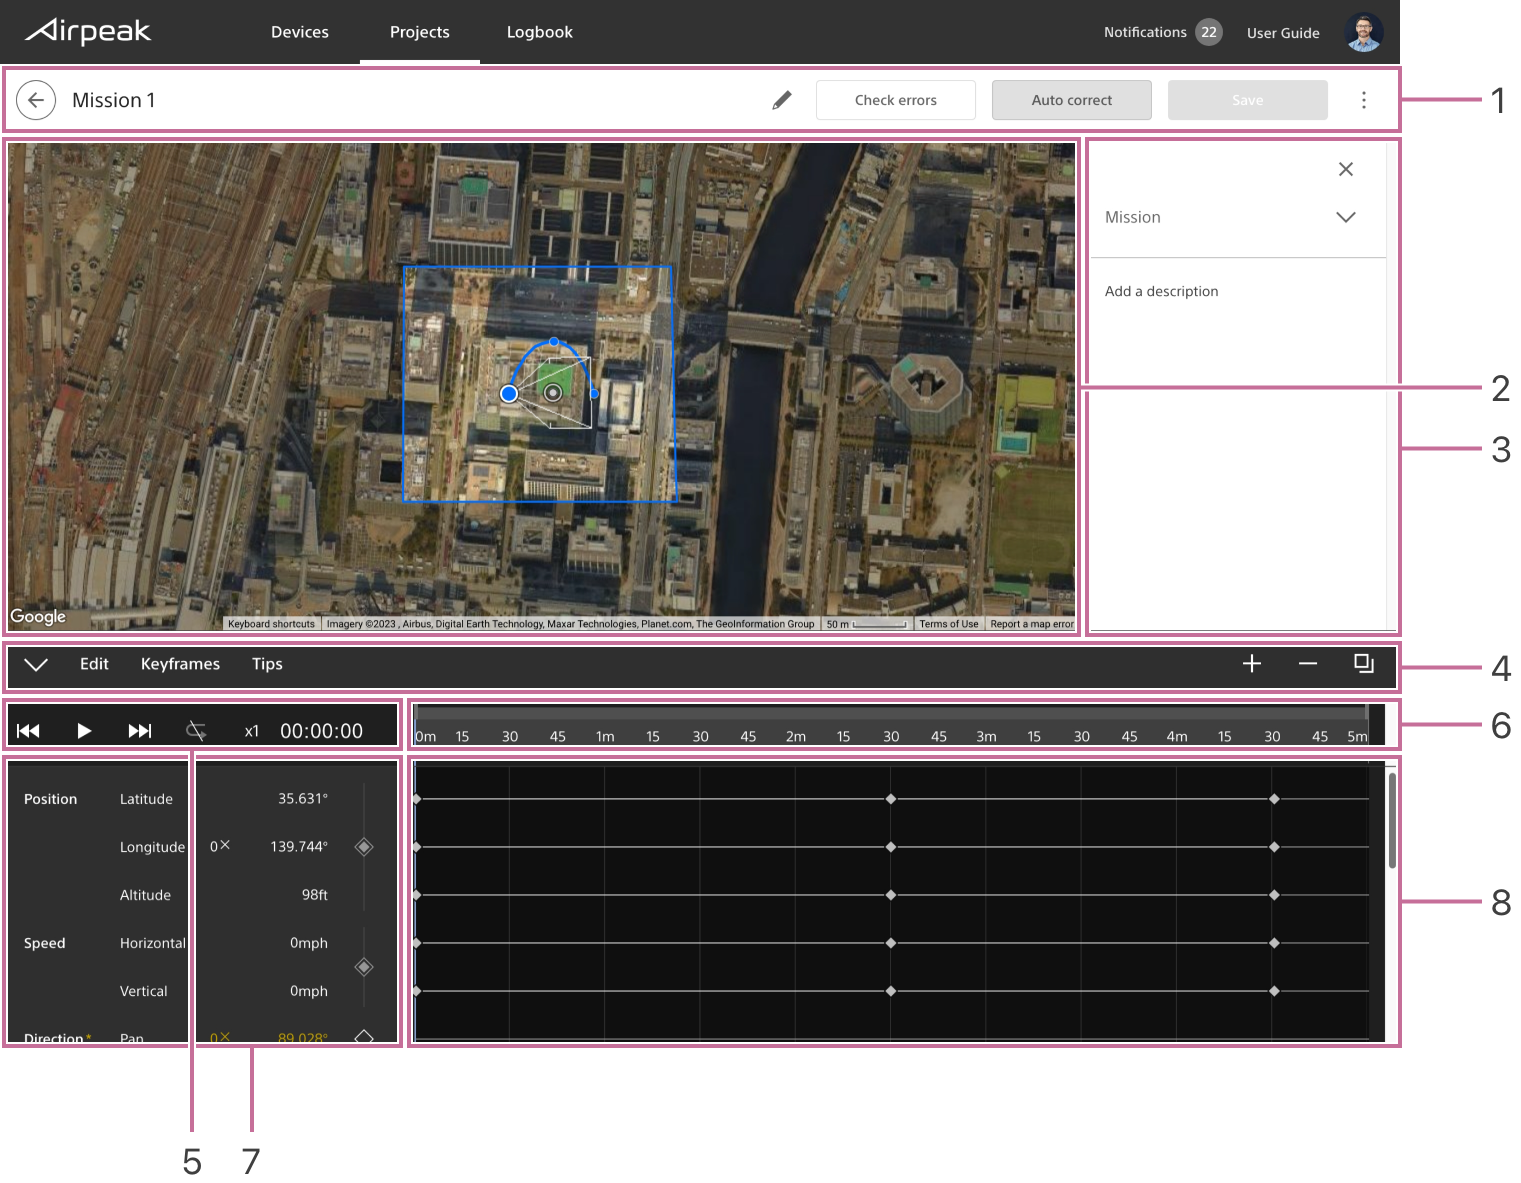
Screen may differ depending on the country/region of use and the account status.
- Title bar
- Workspace
- Mission details panel
- Toolbar
- Control bar
- Parameters list
- Time ruler (elapsed time scale)
- Timeline
Instructions
Click on
Add missionin theFlight planstab, and then selectCreate new Timeline Missionfrom the menu.
TheCreate Timeline Missiondialog will be displayed.Fill in the dialog, and then click on
Set.
The mission edit screen will be displayed.Image ©2022, CNES / Airbus, Digital Earth Technology, Maxar Technologies, Planet.com, The GeoInformation Group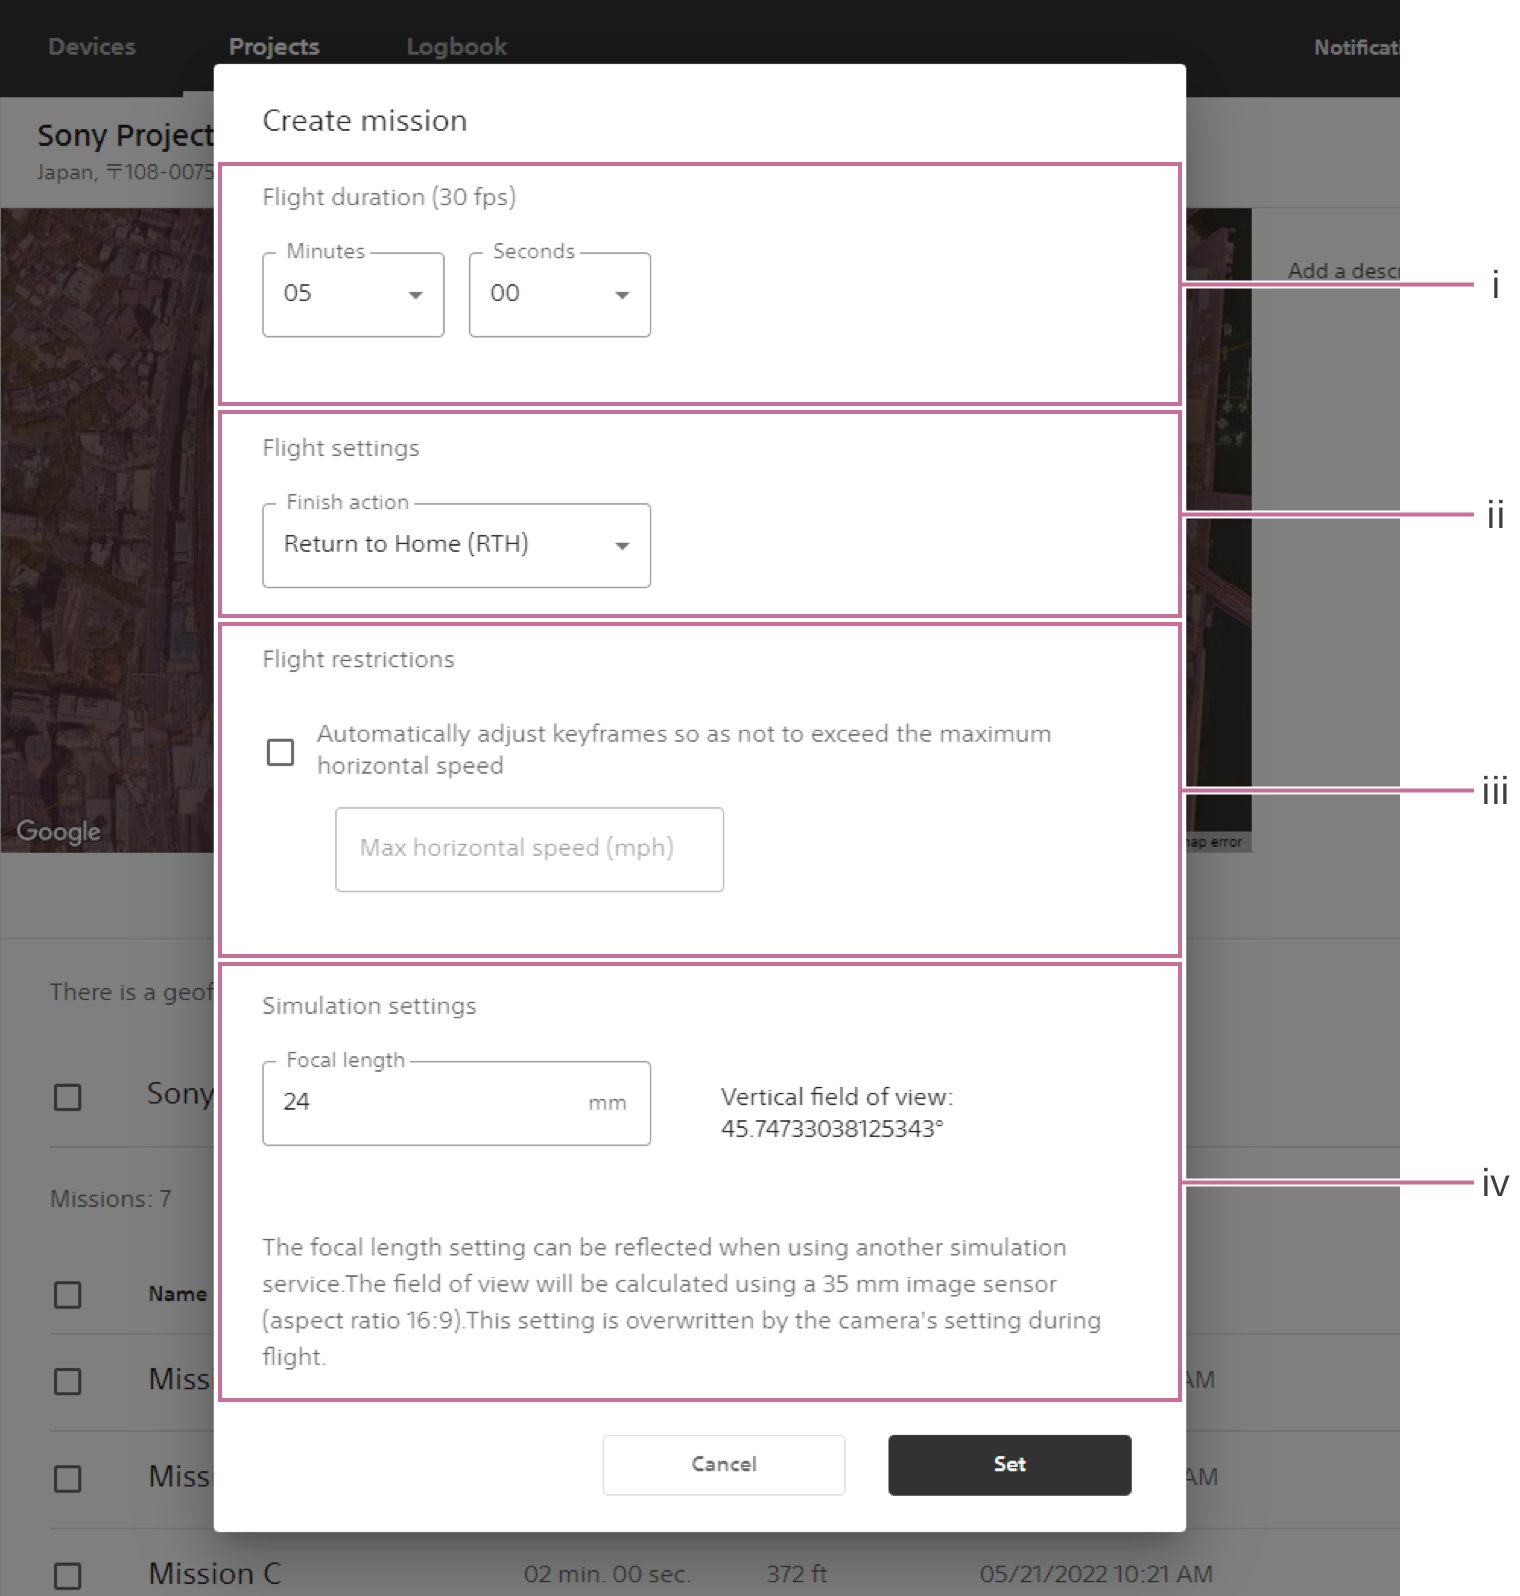
Screen may differ depending on the country/region of use and the account status.Flight duration (30 fps)
You can set a flight duration from 10 seconds to 30 minutes. The frame rate of the Airpeak Base timeline is displayed at 30fps. When shooting a movie, the frame rate setting of the camera is applied.- Flight settings
Finish action: Set a finish action for the aircraft. - Flight restrictions
Automatically adjusting keyframes so the aircraft does not exceed maximum horizontal speed
Ticking the check box “ON” will automatically adjust keyframes so the aircraft does not exceed the designated maximum horizontal speed. - Simulation settings
Focal length: The focal length setting can be reflected when using another simulation service. The field of view will be calculated using a 35 mm image sensor (aspect ratio 16:9). This setting is overwritten by the camera’s setting during flight.
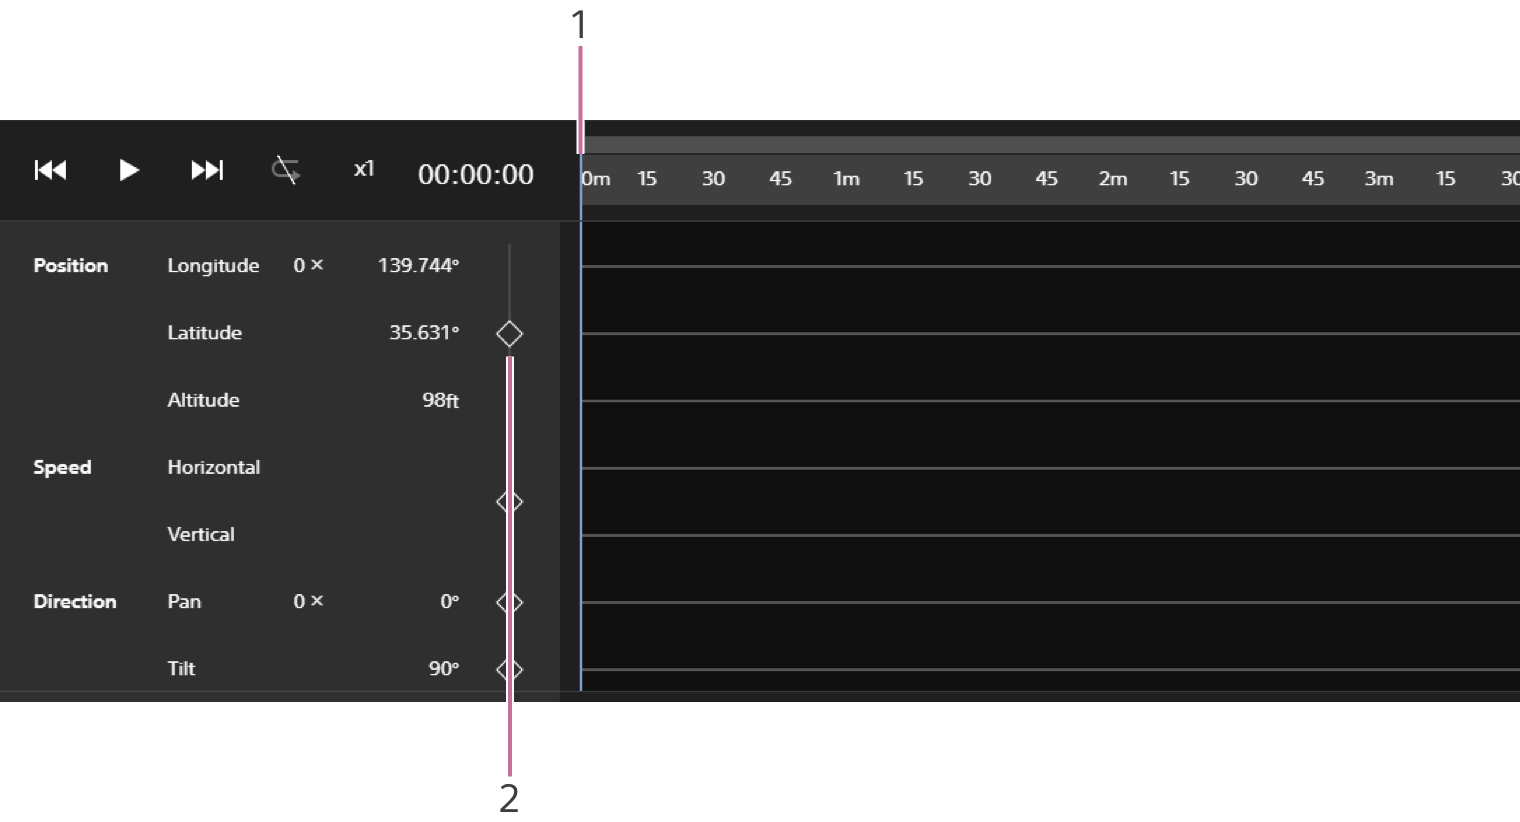
Set a keyframe to the flight start position.
- Make sure that the indicator (1) is at the “0” position of the elapsed time scale.
- Drag (Aircraft) to the desired position on the map.
- Click on Set(2).
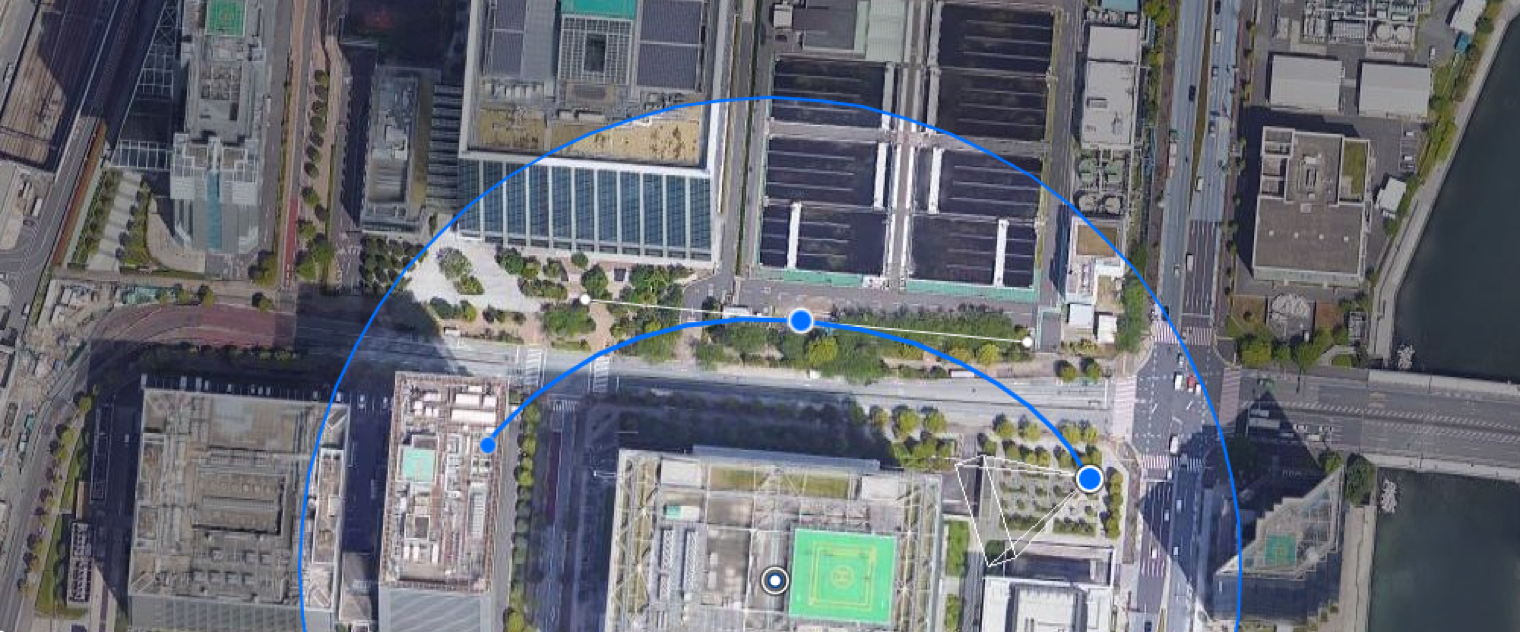
Drag the indicator over the elapsed time scale to move to the next keyframe position.
Repeat procedures step 3 to set another keyframe.
The keyframes will automatically be connected by a natural curve to form a flight path. You can adjust the flight path later.Repeat steps 4 and 5 to set more keyframes.
Click on
Check errorswhen you have finished creating the flight path.Click on
Save.Enter the mission name in the dialog, and then click on
Save.
Adjusting the flight path
Screen may differ depending on the country/region of use and the account status.
- Select a keyframe by clicking on it on the map.
- Drag the keyframe or the handle to adjust the flight path.
- Click on
Savewhen you have completed the adjustment.
Adjusting the altitude of the flight path
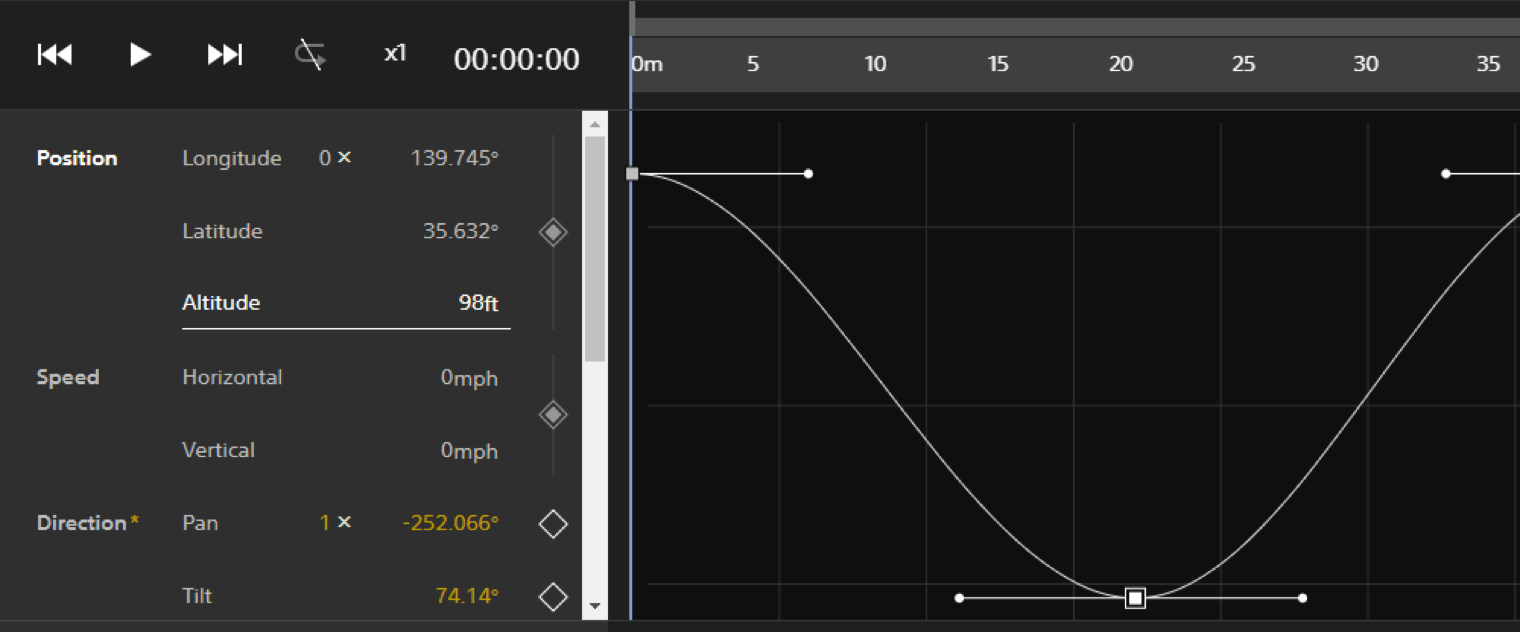
- Click on
Altitude.
Changes in altitude are shown by a line on the graph. - Select a keyframe on the line by clicking on it, and then drag the keyframe or the handle to adjust the altitude.
- Click on
Savewhen you have completed the adjustment.
Selecting nose direction during a Timeline Mission
You can select the direction of the aircraft (yaw axis) from “Follow main camera” and “Direction of movement” in the Airpeak Flight app.
*Use the latest version of the aircraft, controller, and Airpeak Flight app.
Pausing/resuming a Timeline Mission
You can pause and resume a Timeline Mission while the aircraft is running.
For example, if you created a Timeline Mission that exceeds the aircraft’s flyable time, you can change the battery after stopping the Timeline Mission during the aircraft’s run, then resume it from the stopping point. (Only for automatic flights stopped immediately before)
You can also resume automatic flight during manual flight.
*Use the latest version of the aircraft, controller, and Airpeak Flight app.