Correcting a Timeline Mission to be flyable
The Airpeak Base Timeline Mission screen automatically calculates the speed of the aircraft according to the position keyframes.
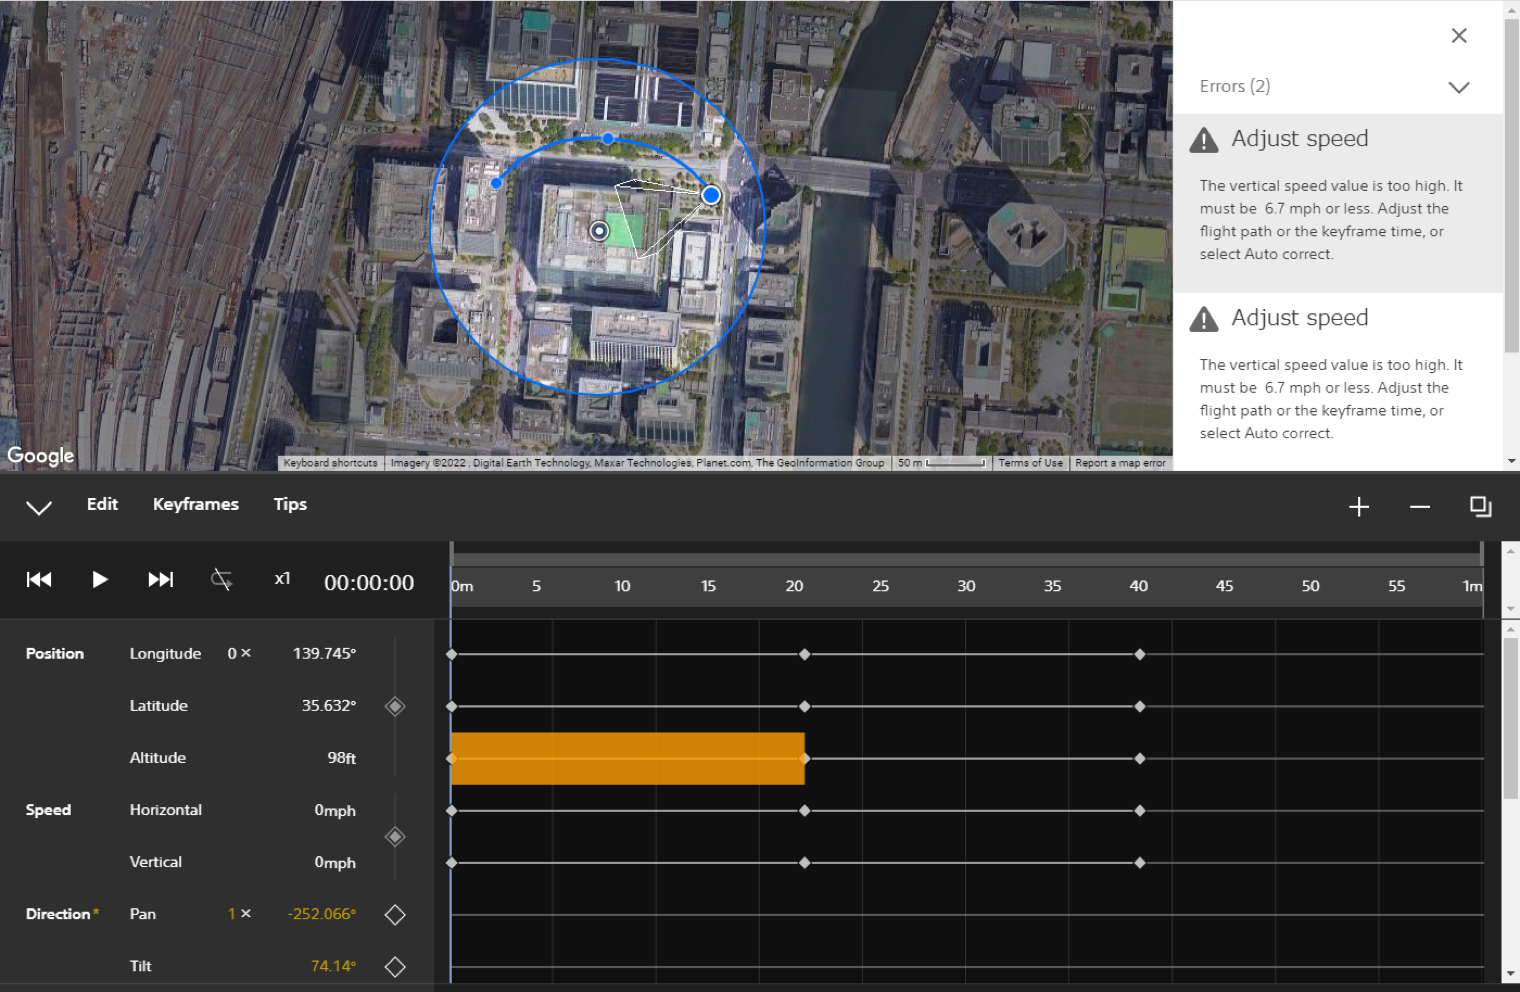
Before executing a Timeline Mission, be sure to run Check errors.
Errors will be displayed for sections of the mission that may not be executable based on the aircraft’s capabilities, such as when the speed or acceleration is too high.
To resolve these errors, adjust the keyframes or run Auto correct.
Checking errors
Screen may differ depending on the country/region of use and the account status.
Instructions
Select
Check errorson the title bar.
If there are any errors, a list of errors will be displayed in the mission details panel. The relevant sections of the path will be highlighted in orange and error icons will be displayed on the workspace.Select an error in the mission details panel or an error icon.
The relevant section will be highlighted in orange on the timeline.
Auto correcting errors
Auto correcting errors related to speed and acceleration will extend the interval of time between keyframes in order to keep the speed and acceleration within range of the aircraft’s capabilities, while maintaining the parameter values of the keyframes.
Instructions
- Check errors, then select
Auto correcton the title bar if any errors are displayed.
Adjusting all the flight speeds of an entire Timeline Mission at once
Changing the flight duration of an entire Timeline Mission is a convenient way to speed up or slow down all the flight speeds of an entire Timeline Mission at once.
The time intervals between all keyframes in the mission will expand or contract at once according to the changed flight duration.
For example, this can be used when you want to adjust all the flight speeds at the same time for surveying and other missions.
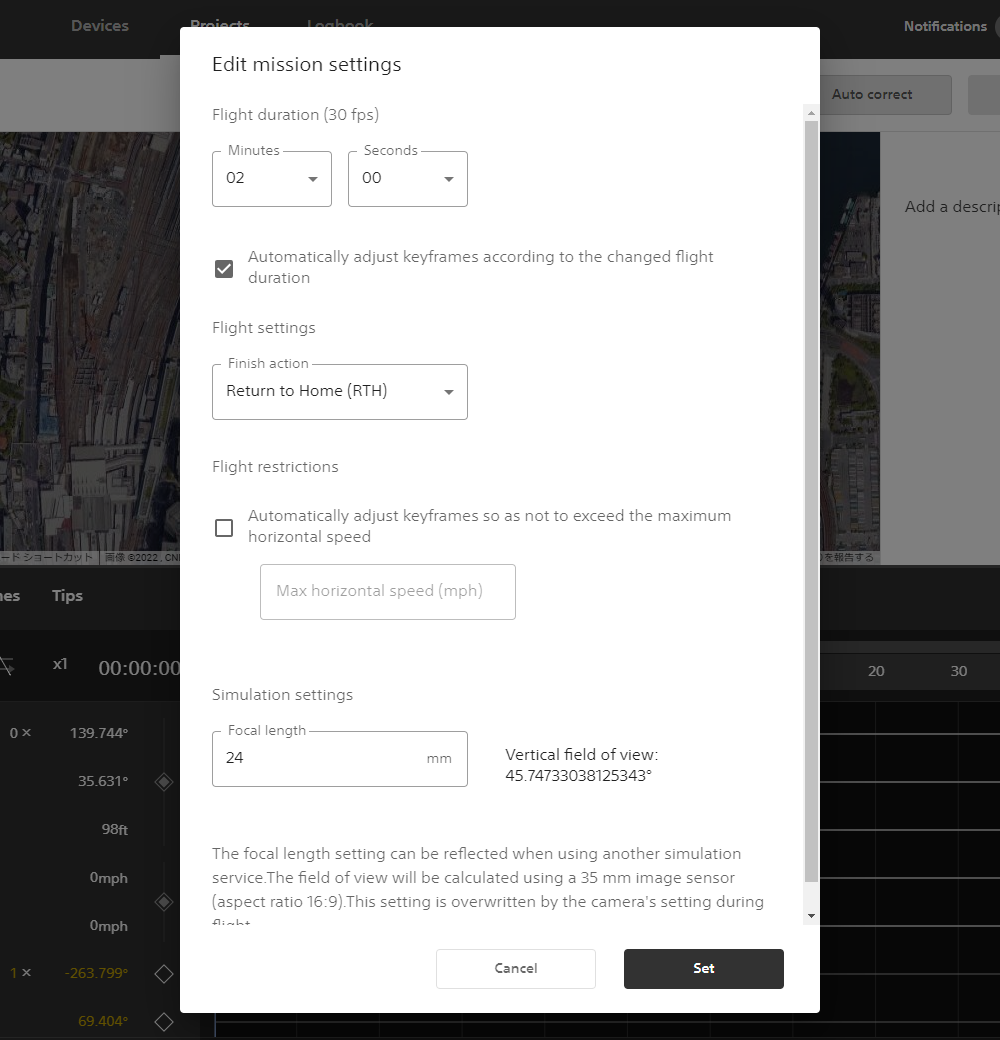
Instructions
- Select
Settingson the title bar. - Tick the
Automatically adjust keyframes according to the changed flight durationbox. - Change the
Flight duration.