Setting the flight area and checking UTM information
What is the “flight area”?
Determining the flight area in advance allows you to easily check UTM* information. The flight area can also be used as a geofence.
*UTM: Unmanned aircraft system Traffic Management
Flight area screen
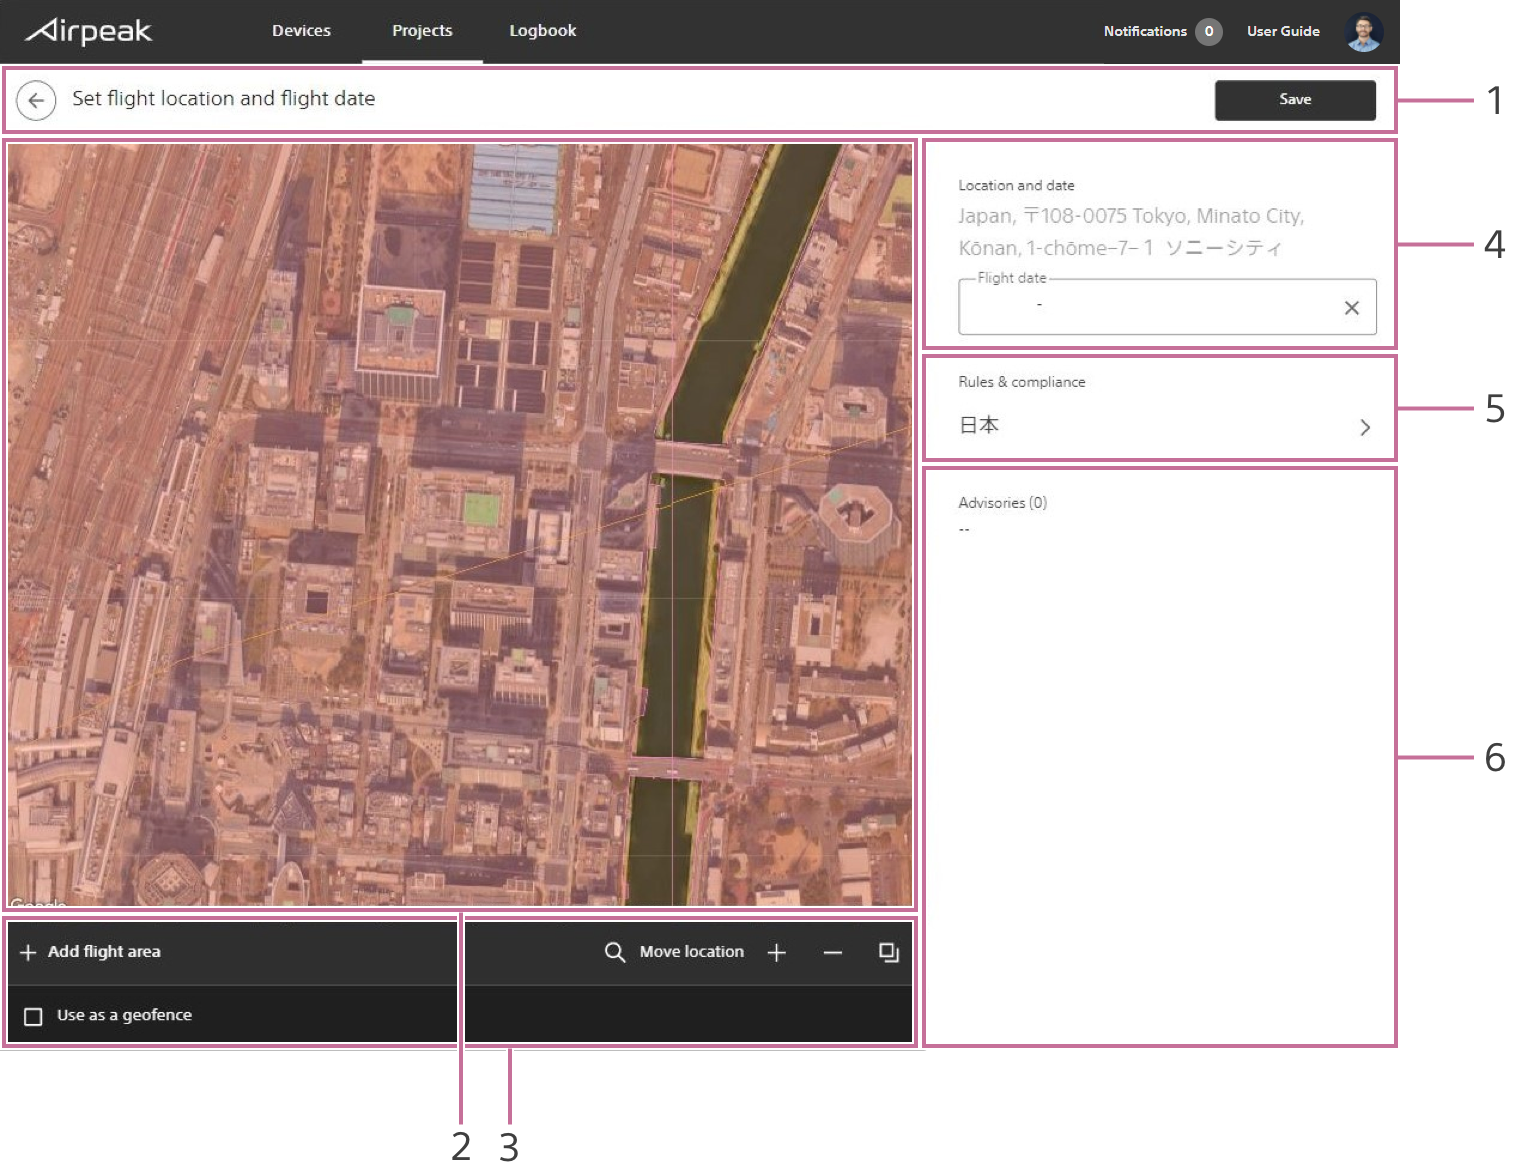
Screen may differ depending on the country/region of use and the account status.
- Title bar
- Workspace
- Toolbar
Ticking theUse as a geofencebox will create a geofence in the same shape as the flight area. - Flight location and flight date
- Rules & compliance
Select the rules & compliance for displaying UTM-regulated zones. - Flight area information
Displays airspace advisories based on the UTM information you selected under rules & compliance.
Instructions
Click on
Check airspaceon the Project page.
The airspace screen will be displayed.Click on
Flight dateon the right side of the screen and set the flight date.Click on
Add flight areaat the bottom left of the screen, and then click on the map.A polygon will appear on the map, indicating the flight area.
Edit the flight area.
Drag point on the edge of the flight area to form the desired shape.Click on
Rules & complianceon the right side of the screen and select the rules & compliance for displaying UTM-regulated zones. Then, click onSet.
UTM-regulated zones based on the selected rules & compliance will be displayed on the map.
If the flight area overlaps with a UTM-regulated zone, advisories will be displayed at the right side of the screen. Modify the flight area if necessary.Click on
Save.